Setting up blueprints in Lightwave
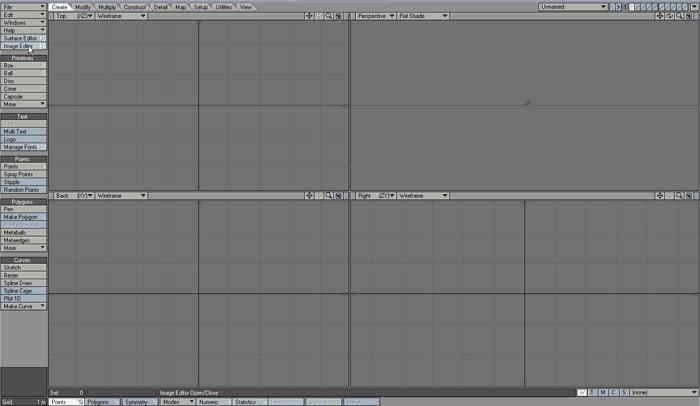
Start the LightWave Modeller the usual way (Screen 01)

Open Image Editor with clicking on "Image Editor" or with Hotkey F6

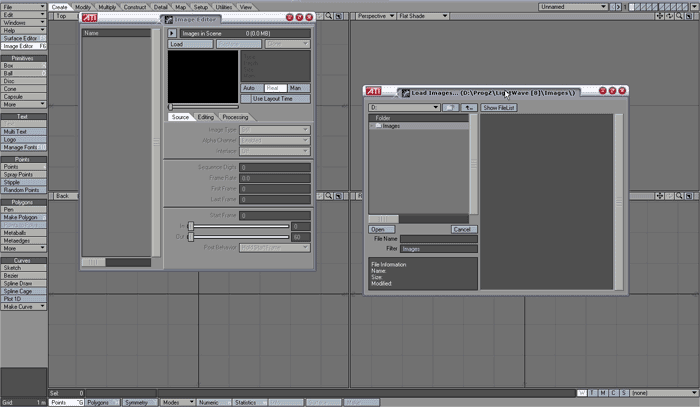
Click on button "Load" in the Image Editor to open the "Load Images" Requester (Screen 02)

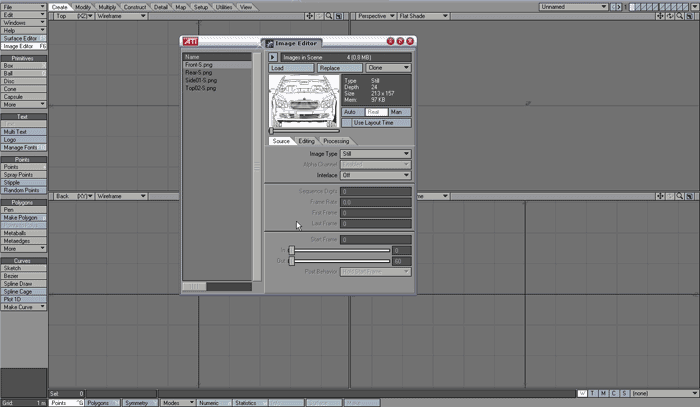
Load all your blueprints into Image Editor

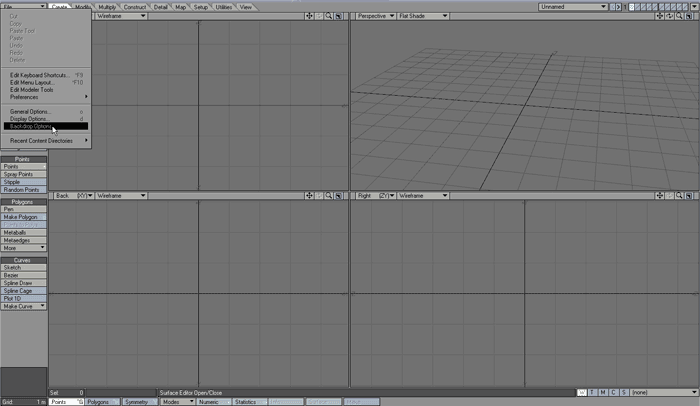
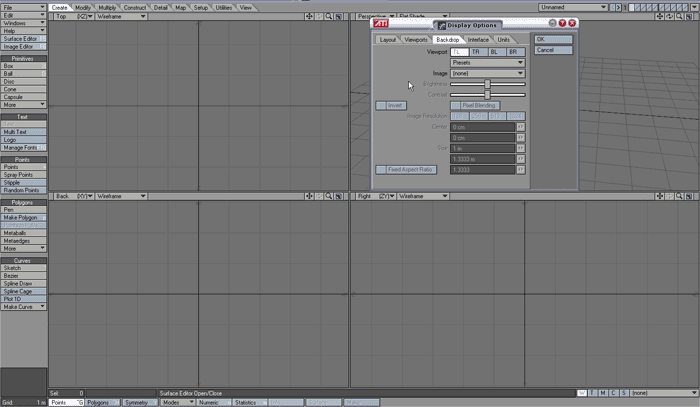
Open your Display Options with already activated Backdrop Option by clicking on "Edit", moving your mouse to "Backdrop Options" and click again. (Screen 04)

Chapter Viewport describes the different Viewports with TL = Top Left; TR = Top Right; BL = Bottom Left; BR = Bottom Right. (Screen 05)

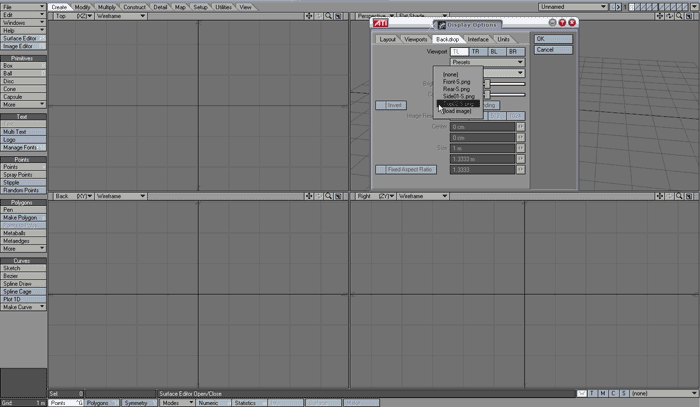
Click on Viewport "TL" and assign the top view blueprint to it by clicking the "image" tab and moving your mouse to the appropriate Image. (Screen 06) The Top view of your blueprint has to look up or down. Never left or right. This is important because you can not rotate your background image in LightWave.

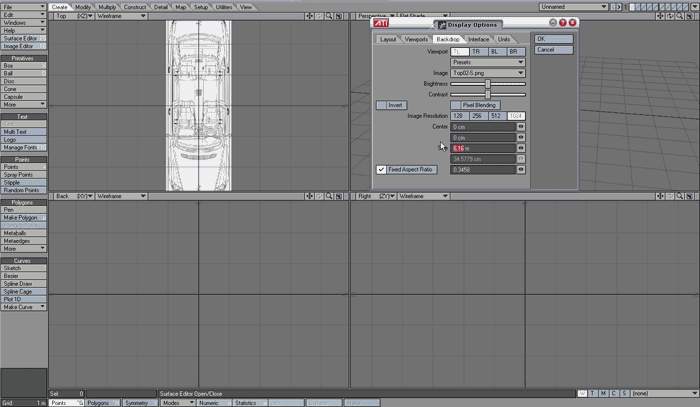
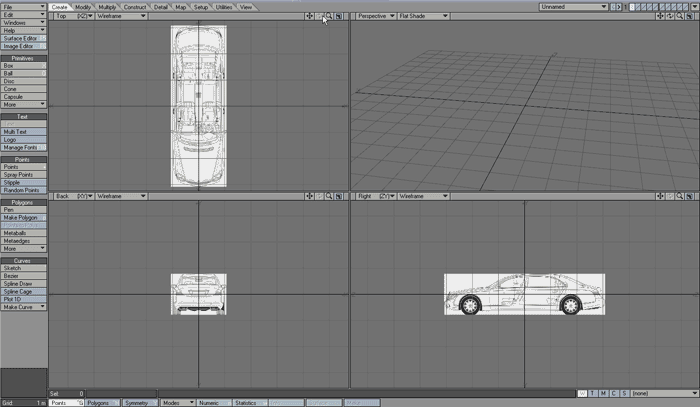
Mark "Fixed Aspect Ratio" and type the up/down size in pixels of your blueprint into the first field. (Screen 07) Important: Typing the size everytime means the up/down size. In all Viewports. Then Click on Enter not Return. This is important because LightWave closes the requester after you clicked on Return but does not when you click Enter. With the fields Center you can move your Blueprints around. This does not make sense because LightWave can rest it on ground for you after modelling is ready but every one can do like he wants. With the tab "Invert" you can Invert your Image. The buttons named "Image Resolution" are necessary for enhancing your Blueprint quality. It sharpens your Background Image a little bit. Good for low resolution Blueprints. Repeat this step for all the other viewports.

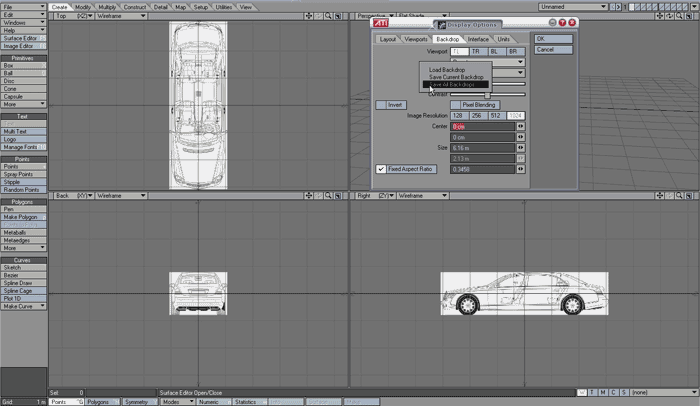
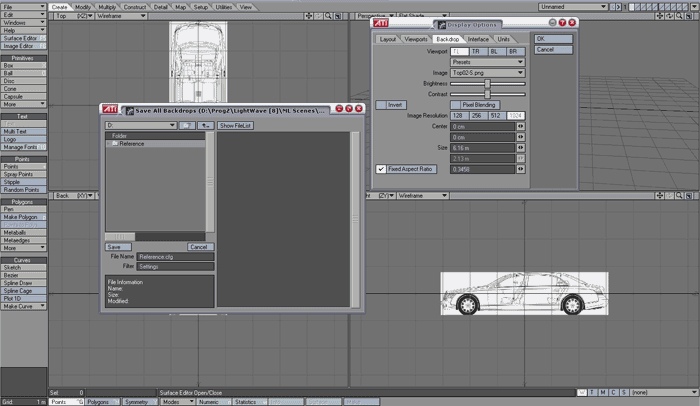
At least click the "Presets" tab and click on "Save all Backdrops" option. By doing this you are saving a .cfg file. This is necessary because LightWave emptys all Backdrops after closing the Project. That means, you have to do all the setup again if you want to continue your work the next day for example. When you save your Backdrops you can click on "Load Backdrop", after loading you model, under the same tab and load your .cfg file so that you can continue your modelling. (Screen 09)

Enjoy Car Modelling with LightWave 3D

Written by Mehmet Lehmann on 19.11.2006

 English (US)
 Español
 Português
 Français
 Italiano
 Deutsch
 Nederlands
 English (US)
 Español
 Português
 Français
 Italiano
 Deutsch
 Nederlands