Setting up blueprints in Maya
Hi everybody!
Here is my tutorial of setting up blueprints, hope u like it!
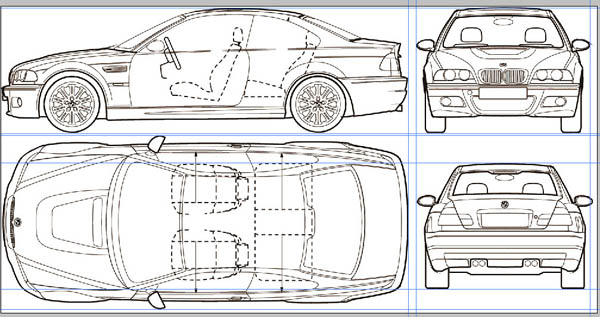
Here I will fix the BMW M3 blueprint, which I took from this site, because it's my last project.
All we need is: blueprint, Maya, Photoshop, hands and a little patience.
First we need is to download blueprint, go http://www.the-blueprints.com/index.php?blueprints/cars/bmwcars/ and download the
BMW M3 (E46) blueprint, which is 1500x770 pix.
Done? Launch Photoshop (PS).
If its in BMP or GIF etc. make sure that in 'Image->Mode->RGB Color' flag is on, its important and it's better to save it in .tiff format.
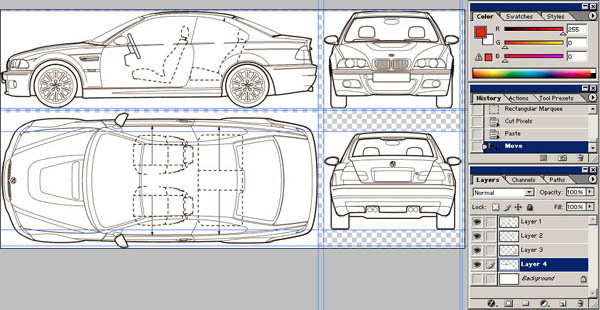
First thing we need to do is to make guidelines for all views to be able to easily cut them:

Tip:
If a guideline will jump when you move it to the end, just hold ctrl.
Then press 'm', and select one by one view and do 'cut and paste' to make them into different layers (its not nessecary, but I suggest to do like this) so you will have something like this:

Then we need to make sure that the dimensions of all the views are the same in all views:
I prefer to do it this way, but if you want to u can do it in another way. ;)
Separate all layers in different files:
Ctrl+LMB on layer then cut, ctrl + n, paste, and ctrl + shift + e or ctrl + e (to merge layers because we don't need them).
For example let's take the side view as a base (I mean lets think that the dimensions of it are right). Then go to file with front view, then Image->Image Size and set the height of it the same as in side view, but make sure that the flag 'constraint proportions' is OFF, it's an important thing. The same thing with back view...
Then set the width of the front and back views the same as the height in the top view and set the width of the top view the same as the width in the side view
So I have these results:
side H: 319; W: 1025
top H: 438; W: 1025
front H: 319; W: 438
back H: 319; W: 438
Save all files in tiff format without compression (I named them front.tif, side.tiff, top.tiff and back.tiff)
Don't forget to do this with top view:
Go to Image->Rotate Canvas->90 CCw, it's important
Well, thats the end of photoshop part, lets launch Maya! :)
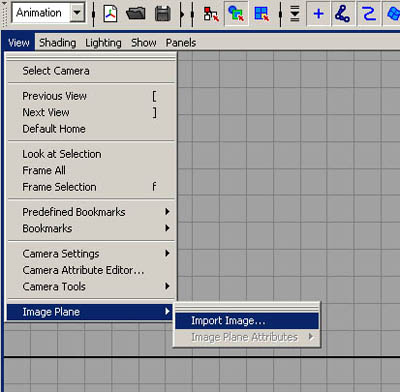
Go to front view
Go View->Image Plane->Import Image

Choose the 'front.tif' do the same to all views... done?
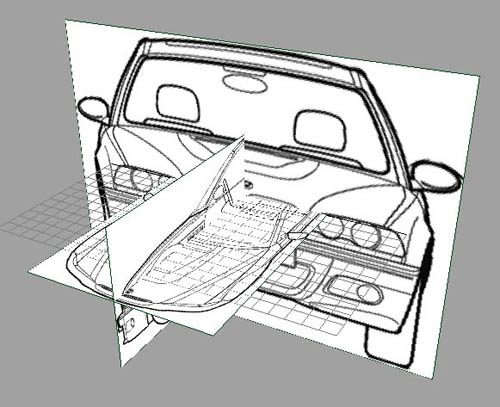
Then go to perspective view.
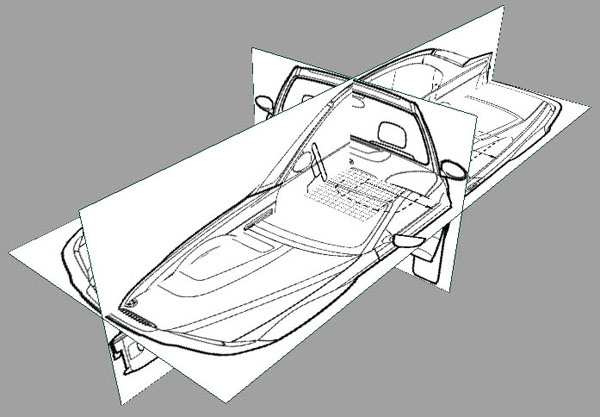
U'll see this:

Oops.. it looks wierd.. what to do? :) dont be mad on it thats why im here :)
Select the front view, it will be higlighted...
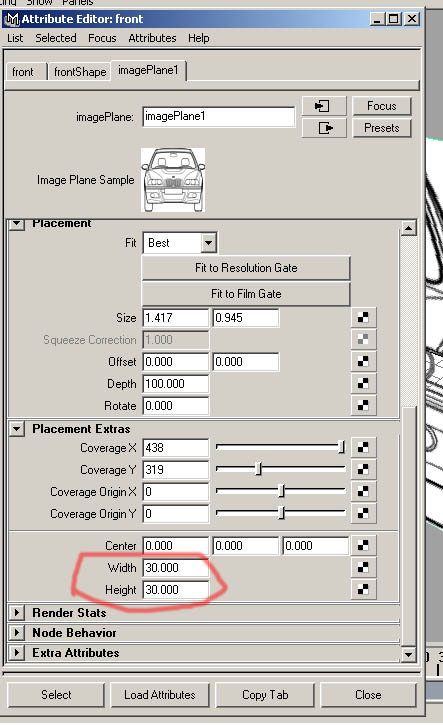
Press ctrl+a and as shown on the pic below set in this fields values of Height and Width of your images (example: for the front view you must put values H: 319; W: 438;)
Tip:
You can divide all numbers by 10 (or by 100), if you want, it will be a good thing.

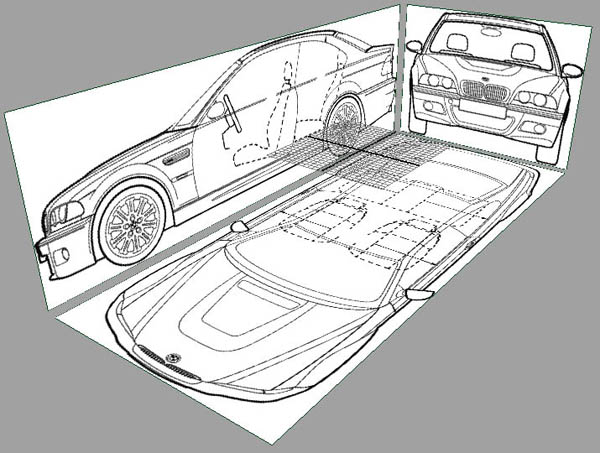
Do the same for all views and u'll see this:

Yeah, thats it, but we need to move it, select any view and go channel box (on the right of Maya's interface), choose section INPUTS, click the name <imagePlane<n>>
and change properties center X, Y, Z to acheive something like this.
Tip:
For front view change only Center Z, for side only Center X etc...

Well, thats what we need, just model it! But ull say: 'Whats with back view?'
I'll explain how I do it in a few words:
I take the back view, inmport it to the front camera(or you can add a new one) and put it in opposite side of front view blueprint...
Tip: if u use the same(front) camera to add the back view just use menu View->Predefined Bookmarks->Back :)
I hope you found this tutorial helpful for u!
Good luck in car modelling, its a hard way u're on!
If you find some mistakes or want to suggest something feel free to e-mail me!
See ya!
All the best,
Veseliy
Contact:
Alexander Radosnov

 English (US)
 Español
 Português
 Français
 Italiano
 Deutsch
 Nederlands
 English (US)
 Español
 Português
 Français
 Italiano
 Deutsch
 Nederlands